Let's recycle!

It's gloomy today, there are signs of hail and it's pouring down with rain. I do LOVE this kind of weather and when I'm cooped up inside, there's no better time to create and I'm not talking about bears either! I've decided to make my own postage bags using recycle plastic bags...some of you may even receive them in the mail as I've packaged the little Twinkee bears in them!! :D
I do like the idea of recycling not to mention how much fun it can be!! Here I've used recycle plastic Australia post bags to create my own JLB packaging. I've also created a little tutorial if you too would like to have some fun recycling and making your own post bags! :D
Here we go....
Step 1. I've used plastic Parcel post bags from Australia post and turned them inside out. Bear in mind, the completed size of the bag will be halved. Instead of Parcel post bags, you can use ordinary shopping bags too.

Step 2. Get 2 to 3 extra shopping bags, lay them out neatly one on top of the other and cut the handles and the bottom of the bags.


Step 3. Open up the sides of the shopping bags you've just cut and lay them flat on the table, one on top of the other. Place the inside out Parcel post bag on top of the shopping bags and fold the other half on top as shown below. The Parcel post bags should be half the size of the shopping bags if not, you can use one shopping bag under and one above the parcel post bag to cover it.

Step 4. Place plastic bags in between a piece of large tissue paper or wax paper and iron. I've used tissue paper in this case. If you are using tissue paper, the tissue paper will be stuck to the plastic, if you are using wax paper, the wax paper will peel away from the plastic. This gives you different affects and outcome.

Step 5. Iron the paper over the plastic bags. You will notice the plastic will melt straight away and may be bit wrinkly but that's okay, it gives character!! :D
Go over it a few times with the iron to make sure the plastic has melted together. Do be careful not to touch the paper straight away as it is VERY HOT!! Let it cool a bit before handling further.
Important Note: I've set my iron to high and have also placed a tea towel over my iron board. Depending on your iron, you may not need such a high setting. The tea towel is to make sure I don't get any plastic on my iron board. Be careful and make sure that the tissue or wax paper is large enough to cover the plastic on both sides and that you are ironing on top of the paper and not the plastic bags as the bags will melt onto you iron and will cause a mess to your iron!

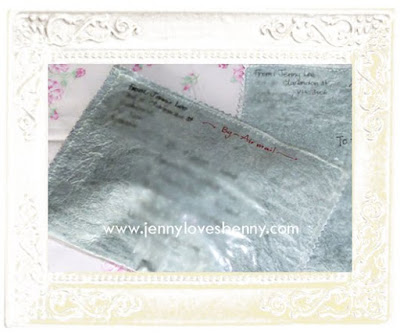
Step 6. Your ironed paper should look something like this (below)!

Step 7. Fold paper in half and use a sewing machine or hand stitch the sides together. Remember to keep on side open to put your treasures in then sew and seal. To give it a little more character, you may want to sew using different colour threads and use craft scissors and cut the ends.

So, there you have it, our little online fun craft session!! Hope you have lots of fun and let those creative juices flow!! :D


Thanks for sharing such creative work! I gotta try it one day too =)
ReplyDeleteCheers, Wayne
Thanks Wayne!! I've used different colour plastic and printed plastic bags and they turned out great! It's a lot of fun and I do hate to contribute to landfill! Hopefully, my customers who receive these can make use of it too :D
ReplyDeleteI got one of those bags and at least it keeps the stuff inside dry:D hehhe I would usually recycle the boxes from abroad to keep my fabrics but this idea is great.. however i need to get a new iron (i think).. will the plastic stick to the iron i wonder...
ReplyDeletethanks for sharing this tip:D
Hi Ming!!
ReplyDeleteYes, the plastic will definitely stick on the iron and may ruin it so don't iron directly over the plastic, put a piece of wax paper over and under it before ironing!!! :D